Best Ways to Install Your Own Solar Panels for Maximum Efficiency?
As the demand for renewable energy grows, many homeowners consider how to install your own solar panels. Industry expert John Doe emphasizes the importance of efficiency in this process, stating, “Maximizing your solar panel output begins with proper installation techniques.” This highlights the need for thorough planning.
Choosing the right location for your panels is crucial. Factors like roof angle, sunlight exposure, and shade from trees can greatly impact efficiency. Misjudgment in these areas can lead to disappointing results. Homeowners often underestimate the complexity of installations.
Additionally, following local regulations and safety standards is vital. Many DIY enthusiasts overlook these details, which can turn a rewarding project into a frustrating experience. Remember, installing your own solar panels is an investment in your future. With careful consideration, you can achieve optimal efficiency and lower your energy bills.

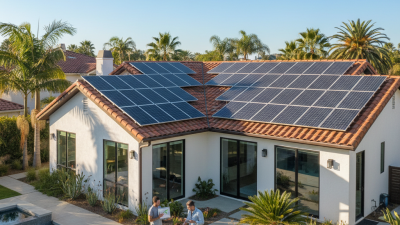
Choosing the Right Location for Your Solar Panel Installation
Choosing the right location for your solar panel installation is crucial. Sunlight exposure is the most significant factor. Areas with direct sunlight for most of the day are ideal. A south-facing roof often receives the best sun throughout the year. Take note of any trees or buildings that could cast shade. This can significantly reduce panel efficiency.
Consider the angle of your roof as well. A flat roof may require different mounting systems compared to a sloped roof. The pitch can affect how much sunlight hits the panels. The orientation is another critical point. If your roof doesn’t face south, it's worth consulting with an expert. They can help you find alternative solutions.
Additionally, local weather patterns matter. If your area experiences many cloudy days, solar efficiency may be lower than expected. It’s essential to monitor seasonal changes. Reflect on how often maintenance might be needed. Dirty panels reduce efficiency and may require regular cleaning. Evaluate your location carefully. Small oversights can lead to major setbacks.
Understanding Solar Panel Types for Maximum Efficiency
Understanding the various types of solar panels is crucial for achieving maximum efficiency. There are three main types:
monocrystalline,
polycrystalline, and
thin-film.
Monocrystalline panels are known for their high efficiency and sleek design. They perform better in low-light conditions, which can be helpful in cloudy climates. However, they tend to be more expensive and take longer to produce.
Polycrystalline panels, on the other hand, are often more affordable. They are made from multiple silicon crystals, resulting in slightly lower efficiency. But their manufacturing process is simpler, making them a popular choice.
Thin-film panels are lightweight and flexible. However, they require more space for the same power output.
When choosing a solar panel type, consider your roof space and budget. Each type has its pros and cons. You might find monocrystalline is too costly for your needs. Alternatively, polycrystalline may not fit limited space. Evaluating your specific situations helps in making a better decision. Ultimately, the best option depends on your energy goals and environment.
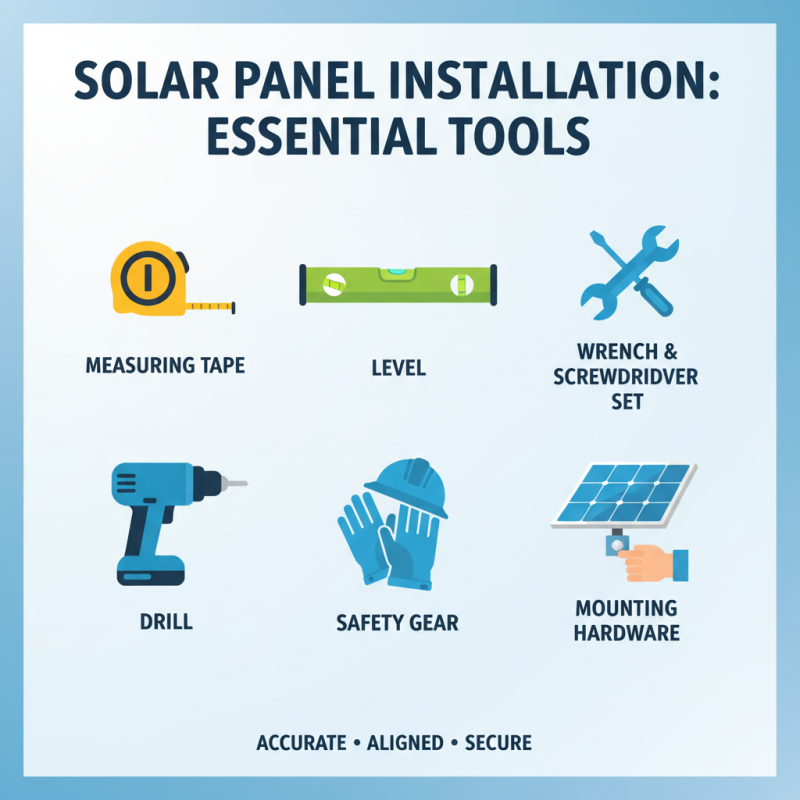
Essential Tools and Materials Needed for Installation
When installing solar panels, having the right tools and materials is crucial. First, you'll need basic hand tools. A measuring tape ensures accurate spacing. A level helps keep panels aligned. A wrench and screwdriver set simplifies the installation process. Make sure you have a drill for securing mounts.
Beyond tools, gather essential materials. Solar panels are, of course, the star of the show. You'll also need mounting brackets and rails for support. A wiring kit is necessary for connecting panels. Don't forget safety gear like gloves and goggles. The process can be messy, so a tarp might be handy.
Installing solar panels can be challenging. Mistakes can happen, like miscalculating space for the array. Always double-check measurements. Each step matters, and overlooking details could lead to inefficiencies. Be prepared for troubleshooting. Adjustments along the way will ensure a successful installation.
Step-by-Step Guide to Installing Solar Panels
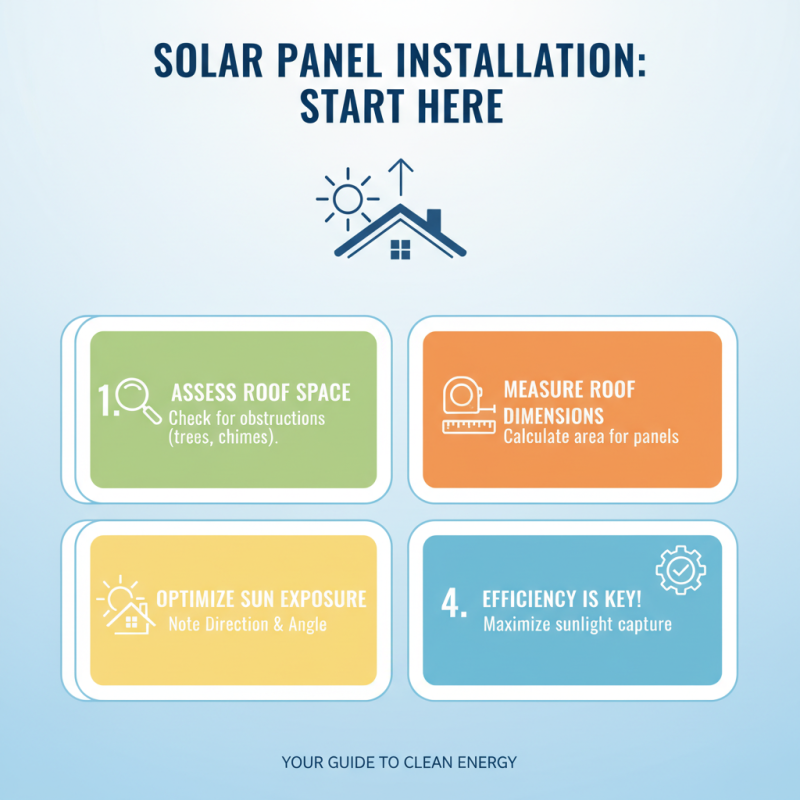
Installing solar panels can seem daunting, but it’s quite manageable with a clear guide. Start by assessing your roof space for solar potential. Ensure there are no significant obstructions like trees or chimneys. Measure your roof’s dimensions. Consider the direction and angle of sunlight exposure. This step is crucial for efficiency.
Next, gather all necessary materials and tools. You’ll need solar panels, mounting brackets, and wiring supplies. Don’t forget a ladder and safety gear. Follow the manufacturer's guidelines for installation. Make sure to position the panels at the optimal angle. This can significantly boost energy absorption.
Remember, not everything goes as planned. You might face challenges like unexpected weather or missing parts. Be prepared to troubleshoot. Take your time to ensure everything aligns perfectly. A small mistake can lead to reduced efficiency. Reflect on what works and what doesn’t. Each installation is a learning experience.
Maintenance Tips to Ensure Long-Term Performance of Solar Panels
Maintaining solar panels is crucial for their long-term efficiency. Regular cleaning is essential. Dust, leaves, and bird droppings can accumulate. A simple wash with water and a soft brush can help. Make sure to do this once or twice a year. Be careful not to scratch the surface.
Monitoring system performance is also important. Keep an eye on the energy output. If it drops unexpectedly, something might be wrong. Check the inverter and connections. Sometimes, issues are minor, like a loose wire. However, serious problems can occur. Don’t ignore signs of wear.
Furthermore, consider the location of your panels. Trees may grow over time and create shade. This can diminish performance. Inspect surroundings frequently to avoid this. It’s a process of learning and adapting. Your solar system may require adjustments over the years. Each small change contributes to better efficiency.