
Choosing the right High Mast Lighting system begins with the site, not the catalog. A port yard, stadium, and highway interchange each need different light distribution. Pole height alone cannot solve poor visibility. The layout, mounting locations, target illumination, and maintenance access all matter. So does the surrounding environment.
Architect Frank Lloyd Wright observed, “More and more, so it seems to me, light is the beautifier of the building.” His words offer a useful reminder: lighting shapes how people experience a place. For high-mast projects, that experience depends on more than brightness. Optics affect uniformity and glare. LED output and controls influence energy use. Pole materials and foundations must suit local wind, weather, and soil conditions. A drawing may look convincing, yet still miss shadows near a fence or service road.
This guide explains how to compare those choices with practical questions. What area needs coverage? How evenly should it be lit? Can crews safely reach the luminaires for maintenance? Photometric calculations help answer these questions, but assumptions deserve a second look. There is no perfect layout for every site. A careful selection balances visibility, operating costs, durability, and future access. The right High Mast Lighting design is not simply the brightest one; it is the one that works reliably where people need it.
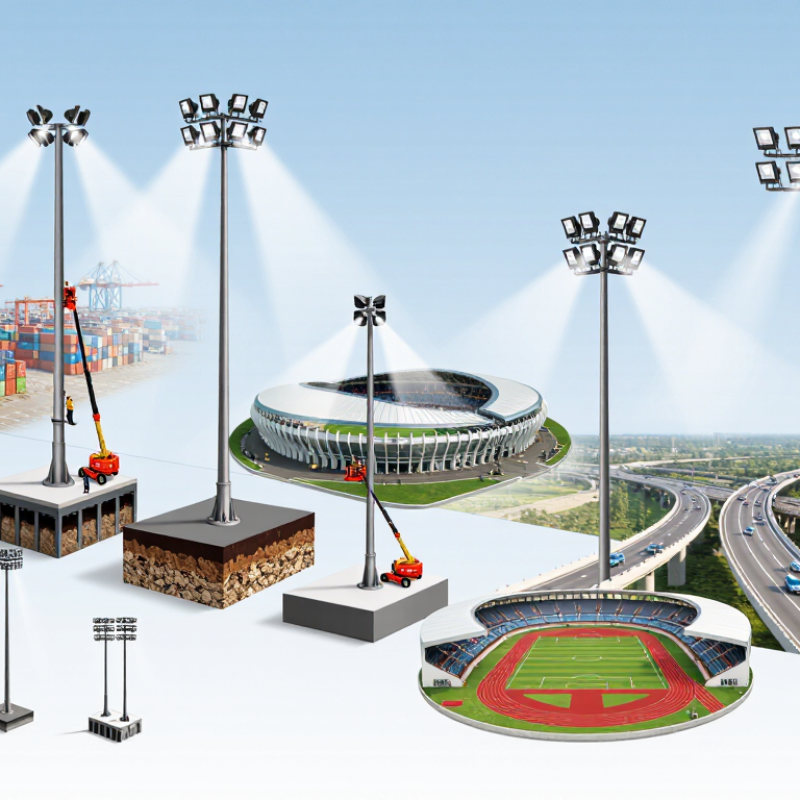
Before selecting high mast lighting, walk the site in daylight and after dark. Note mounting locations, ground levels, nearby buildings, trees, and reflective surfaces. A wide, open yard behaves differently from a crowded work area or sports field. Small details matter. Mark the areas that need clear visibility and spots where glare could affect drivers, workers, or neighbors. Existing poles and shadows can change the plan more than expected.
Define what people need to see. A storage yard may need consistent light across vehicle routes, while a sports field may require stronger vertical illumination so players and cameras can follow action. Check operating hours, maintenance access, and whether different zones need separate controls. Ask staff where visibility feels poor; their observations can reveal issues a daytime drawing misses. Their feedback may be incomplete, though, so verify it on site.
Set measurable requirements for brightness, uniformity, glare control, and color appearance before comparing fixtures. A photometric layout can show how light will reach the ground and where dark patches may remain. Include pole height, aiming angles, and surrounding obstructions in the assessment. Avoid choosing by wattage alone. It does not show how evenly a space will be lit. Review the proposed layout with a qualified lighting professional, then reassess after installation; real conditions can expose assumptions that looked fine on paper.
Measure the site in daylight, then map its length, width, working zones, and nearby obstructions. A loading yard needs light across truck lanes and loading edges, while a playing field needs consistent illumination across the full surface. Note where tree canopies, signs, or buildings may block beams or cast shadows. Define the coverage area by the tasks people perform, not just the boundary on a plan. Include access roads and pedestrian routes if they need the same lighting level. Small details matter.
Choose mast height after reviewing a photometric layout for the site and its intended activity. The layout should show illuminance levels, uniformity, aiming angles, and likely dark spots between poles. A taller mast can spread light farther, but may increase spill light and make maintenance more demanding. Compare several heights and pole spacings; changing either can affect glare and shadows. Allow for future changes, such as added storage racks or new traffic paths. Do not rely on a simple height-to-spacing rule alone. Verify the design on site after installation, since drawings cannot capture every obstruction or surface reflection. Plans miss things.
This illustrative comparison assumes a circular beam with a 60° full beam angle. The footprint area is calculated geometrically as π × [mast height × tan(30°)]². It is not a prediction of usable illuminance or uniformity: check the luminaire photometric data, required lux levels, pole spacing, and overlap to determine the actual coverage area.
Choosing the right luminaire starts with the work happening below it. A loading yard, sports field, and highway interchange need different light levels and visual comfort. Check the required illuminance and uniformity for the site, then compare photometric data rather than relying on fixture wattage alone. More lumens do not automatically mean better visibility.
Match light output to pole height, spacing, and surface conditions. A high mast may need several carefully aimed luminaires instead of a few very powerful ones. Consider maintenance access and lumen depreciation, too; output can fall as equipment ages or lenses collect dust. Small details matter.
Beam distribution shapes where the light goes. Narrow beams can reach distant areas but may create bright patches, while wider beams can improve coverage and increase spill light. Review a photometric layout for overlap, dark gaps, glare, and light near site boundaries. Field conditions rarely match a neat drawing exactly. Verify aiming after installation, and adjust where practical. I would treat early calculations as a strong starting point, not a guarantee; actual surfaces, weather, and mounting tolerances can change the result.
How to Choose the Right High Mast Lighting?
Evaluate the pole before selecting fixtures. Height, arm geometry, luminaire weight, and wind exposure shape structural demands. AASHTO’s 2015 LRFD Specifications for Structural Supports address wind and fatigue—checks that matter when tall poles face repeated gusts and vibration. Ask for documented pole, anchor, and foundation calculations. Corrosion protection matters too, especially near coastlines or industrial sites. Details get missed.
Match the power supply to the full load, including driver inrush, cable voltage drop, surge protection, and future capacity. Confirm that drivers support the intended dimming method; otherwise, controls may flicker or fail. For controls, combine scheduled operation with photocells, then consider occupancy-based dimming in lower-activity areas. DOE’s 2017 review, Energy Savings from Networked Lighting Control Systems, reported average savings of 47% across studied projects. That figure is not a high-mast guarantee: site conditions and operating schedules differ. Commission each zone at night, check light levels on the ground, and keep a manual override. I would not assume one preset fits every yard. Start with measured requirements, then tune the controls after real use.
| Application | Typical Pole Height | Pole Design Considerations | Illustrative LED Setup | Power Supply Considerations | Lighting Controls | Estimated Energy Use* |
|---|---|---|---|---|---|---|
| Large parking area | 15–20 m | Use a tapered steel pole and a luminaire arrangement designed to limit glare and improve uniformity. Confirm wind loading, foundation design, and access for maintenance against site conditions. | Example: 6 luminaires × 200 W | Check circuit capacity, cable length, voltage drop, protective devices, and the LED drivers’ input-voltage range. | Photocell or astronomical time switch; consider scheduled dimming during low-activity hours. | 12 kWh per night at 10 hours |
| Port or logistics yard | 20–30 m | Specify a corrosion-protection system suitable for the local environment. A lowering headframe can simplify ground-level luminaire servicing where the pole design supports it. | Example: 8 luminaires × 300 W | For larger connected loads, assess a three-phase feeder, load balance, earthing, surge protection, and isolation arrangements. | Photocell with a time schedule; use dimming only where operational and safety requirements allow. | 24 kWh per night at 10 hours |
| Highway interchange | 25–35 m | Base the pole, anchor bolts, and foundation on a site-specific structural and geotechnical assessment. Check luminaire aiming, road-user glare, and maintenance access. | Example: 8 luminaires × 400 W | Verify feeder capacity and voltage drop for the full cable route. Select drivers and protection to suit the supply and local electrical requirements. | Astronomical time control or photocell; consider centralized monitoring and planned dimming profiles. | 32 kWh per night at 10 hours |
| Sports or event area | 30–40 m | Coordinate pole locations and aiming with the required playing-area illuminance, uniformity, and glare limits. Confirm structural design and safe access for inspection and servicing. | Example: 12 luminaires × 500 W | Assess demand, phase balancing, switching current, and circuit protection. Confirm that controls are compatible with the chosen LED drivers. | Separate switching or dimming scenes for training, events, and standby use; schedule operation to avoid unnecessary runtime. | 60 kWh per night at 10 hours |
*Energy figures are illustrative connected-load estimates: luminaire quantity × rated wattage × 10 operating hours. Actual consumption depends on operating time, dimming, driver losses, and system design. Pole height, structural design, electrical supply, and lighting performance should be confirmed by a qualified designer for the specific site.
How to Choose the Right High Mast Lighting?
High mast lighting decisions start with the ground below, not the pole height. At a freight yard, a dark loading lane can hide a person, a wheel stop, or spilled water. Map work areas, traffic paths, and likely shadows before comparing output. Uniform light often matters more than a bright patch beneath each pole. Glare matters too.
Safety depends on more than illuminance. Check where drivers look, how fixtures aim, and whether nearby homes or roads receive unwanted spill. Specify suitable ingress protection and materials for local weather, dust, and corrosion. Keep emergency access clear around the base. Small obstruction.
Maintenance can shape lifetime cost. A lowering system may let crews inspect luminaires from ground level, but it needs proper training and routine checks. Ask how long replacement parts take to arrive, and whether fixtures can be serviced without replacing whole assemblies. Record failures and cleaning dates. Real sites get messy.
Compliance needs a project-specific review. Confirm local lighting limits, electrical requirements, structural wind loads, and any site or transport authority conditions with qualified professionals. Keep photometric layouts, installation records, and inspection results together. Requirements differ by location and can change. A design that looks adequate on paper may still leave a shadow behind stacked containers, so verify aiming and light levels after installation. The measurements may be inconvenient. They are useful.
